Minimalism; My journey, Part 1

minimalism image

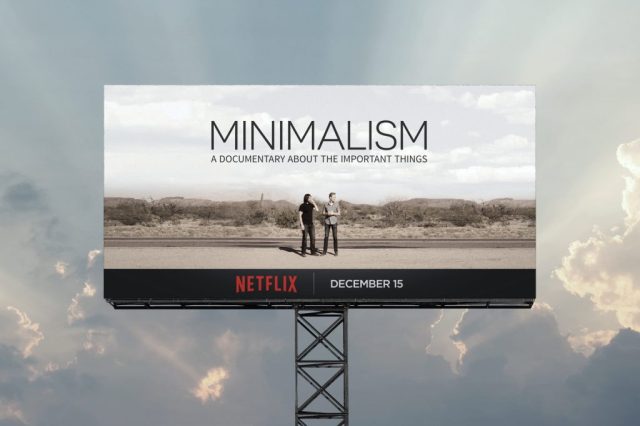
I believe anyone who watches the Minimalism Documentary  is amazed by how materialism has become the new normal. On how we have accepted material stuff to take over what is or should be important in our lives. Basically, we are constantly acquiring stuff and not because we need it. I first watched Minimalism on Netflix in July 2017 and it blew me away! I have since watched it several more times and every time I pick up a new lesson.

I decided to take on minimalism in August 2017, which is my birth month and which I consider my new year. Minimalism, in my view (I have also come to learn that it means different things to different people), is living a wholesome life with less material possessions. The reason I took it on was because; one the documentary made so much sense; two, I needed to ensure the most important things to me are given priority; and three, I knew I had acquired so many things over the years that were not adding value.

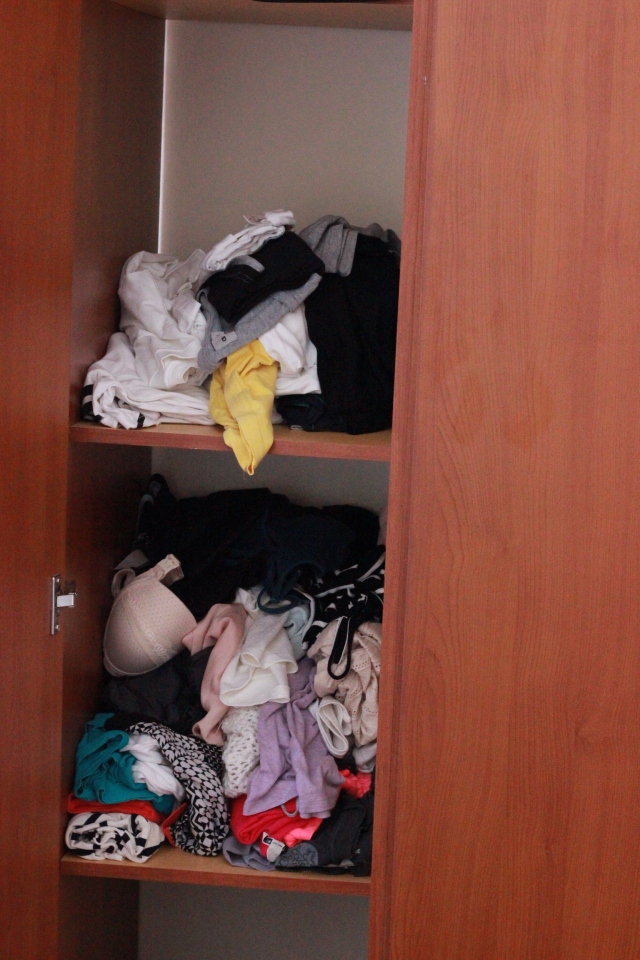
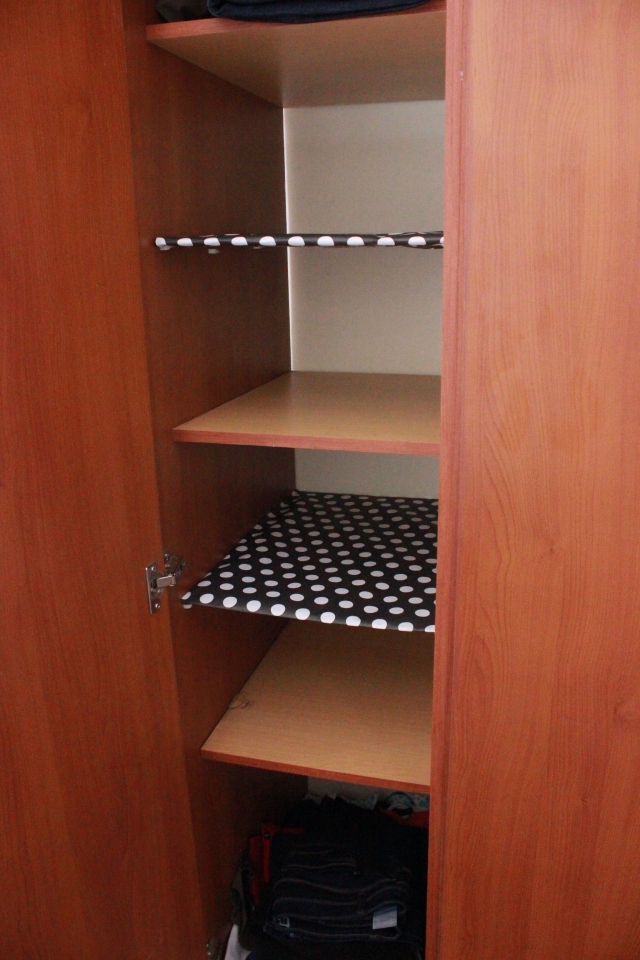
I opted to start with my clothes, shoes and handbags. I had occupied a ridiculous amount of closet space and rooms in the house. Armed with several trash bags and music, I dug in. Now, if you have tried to do this before, you know this is where things get murky. Conflicting emotions check in, the hope to lose weight back to a size 10, it was a gift… To go around this, I asked myself three questions each time I felt conflicted- have I worn this in the last one year?, Do I like how it looks on me now? What value will it add to me by keeping it?

It took me two days, over two weekends to go through them all. The result? I was now able to fit all my clothes in one closet, they all were clothes I liked and looked good in. Shoes and bags faced the same fate. I had a ton of stuff to get rid off. This I did by asking my house help to pick what will fit her family, I gave what was left to a charity shop at Adams Arcade called The Love Shack. They sell second hand clothes and the money raised supports a children’s home in Kawangware.

The feeling after this whole exercise was the most fulfilling!! I felt lighter and happier. It was easier to pick outfits, I no longer had those moments of I have nothing to wear while my closet is crammed with clothes!

Sustaining the leaner wardrobe has to be an active decision. I don’t just buy things because they are on offer, because it is oh so cute! No. I will make a purchase when I realize that I do need it and it will play a role in my day-to-day life. I have saved tons of money and time, walking away from deals and shops. And now, I can put that money to things that matter in my life!

Minimalism is not a destination, it is a conscious journey that is unique to every one who picks it up. See we are all different, what is important to me may not be important to you. For me that is the main point of departure on this journey.

Stay tuned for more on minimalism.
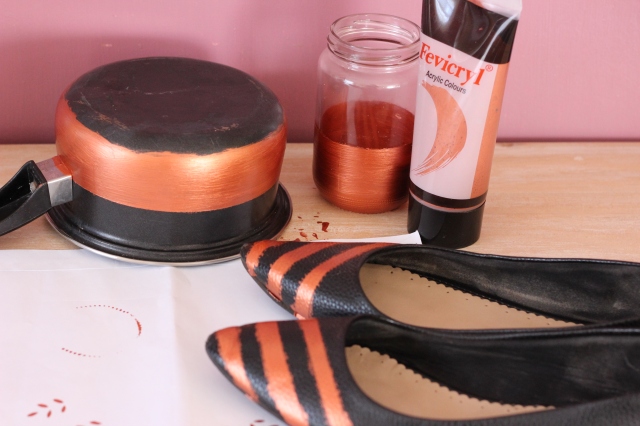
Keep it DIY!


Growing my craft

Hello DIYers

Craft has been described as a skill using the hand. I like to think it also involves the mind. While I was away from the blog, I was busy growing my craft. Mostly growing my mind and knowledge of the interior decor world in Kenya and beyond.

I went through a three-month course at Elle Interiors guided by the amazing Daphine and Jan Okonji. It was a boot camp guys, it starts slow but picks up pretty fast and becomes tougher as you come to the end. Blood, sweat, time and tears. The result is glorious! You leave a different person, knowledge and skilled.

Part of the course required that we develop an interior design concept for a hotel. We were provided with a proper brief including the budget we were to work with. Four weeks is all the time you have to develop designs and render, budget and develop project plan. Blood, sweat, time and tears!!

Here is a glimpse of what I did using Archicad.

collage- Amara Hotel

Hotel room views 

R Bathroom collage- Amara Hotel (1)

Bathroom views

Keep it DIY!

DIY Palette Furniture

Hello DIYers

Pinterest is my happy place!! I can spend hours on end ogling and saving stuff in the very many categories i have created. Follow me @hazelkirigo

One particular obsession i have on Pinterest is palette furniture! Oh the possibilities!!

I also happen to believe in the words of Paulo Coelho in one of his most popular books The Alchemist, the world listens to your hearts desires and conspires to make it come true, or was that The Secret? Oh well, the principle is the same.  So the universe responded to my desire to make palette furniture and a delivery was made to our office and there were palettes left behind and they were not going to be used!! When the Universe speaks, you listen! I quickly whisked all four palettes in my car, thank goodness for station wagons with expandable boots! So this past weekend i decided to go for it.

What i used for this project:

  • 4 Palettes
  • 1 small (3×6) mattress cut to fit the palette
  • 2 big cushions
  • Masaai blanket

Step one

Putting together the palettes to form a seat. I placed one at the back and stack the remaining three pieces.

IMG_20170909_141628

Behold we have a seat!img_20170909_141750.jpg

Step Two

Next was to place the soft furnishings. Mattress covered with the masaai blanket as the seat and the big cushions as the back rest.

img_20170909_141858.jpg

The final look of the balcony.img_20170909_143151.jpg

Gladly the weather has improved and we can enjoy some sunny afternoons and even some evening drinks in the balcony!! No plants yet, those will feature later, my daughter will happily much away the plants and soil!

Keep it DIY!


No Bake Biscuit Cake

Hello DIYers!

Has someone come to visit you and bring you something that leaves you wondering;

a) Does this person actually think i like this? and

b) where they got it?

Someone brought me a box of biscuits. The above was what went through my mind…But i am not one to look a gift horse in the mouth and so i chose to make the most of it.

Google away i did. Seriously, what did we do before Google and YouTube tutorials?  I looked for recipes that could help me make use of my carton of biscuits and i found one that was not intimidating and that i could easily pull off.


IMG_20170813_142513 (2)

It required only four ingredients: Biscuits, chocolate syrup, whipped cream and dark chocolate.

The next step is to crush the biscuits, mix in the chocolate syrup. Because i love coffee, i added coffee to the chocolate syrup.  Put the mixed crushed biscuits in the the baking tin, or a glass container ( so that its easy to come off).  Boil the whipped cream, and pour over the dark chocolate and stir, let it cool. Then spread it over the biscuits. I added a little extra peanuts that i just crushed and spread over the chocolate. Refrigerate overnight and viola! You have got cake!

IMG_20170814_173145 (2)

Before going into the fridge

IMG_20170814_173346 (2)

After refrigeration.

IMG_20170814_173354 (2)

Yum. Yum. Nom. Nom.

Here is the video.

Try it!

Keep it DIY!

Taking Stock – Two

img_7743Hello DIYers!!

I recently celebrated my birthday. For me, this day is the beginning of another year. I take time to think about and appreciate what I have achieved, failed to achieve, or achieved partially. I also take time look ahead and plan.

I’m not one to usually tell people how to live their lives, but well I’m three plus decades on this earth and old people are allowed to spew some wise words every so often. So here goes;

On career– It is a great thing to have one. It is also great to be considered a professional and to be good at what you do. Invest in yourself professionally, read books and journals, take short courses, join a professional society, volunteer your skills and learn new skills. Never stop learning.

The tricky bit though is whether or not you enjoy what you do. This is the difference between looking forward to the next work day or waking up and sitting in your bed debating or dreading going to work. I have no silver bullet. But the reality though is that bills will not wait for you to be happy in your job.

On finances– You have got to have a relationship with money. Preferably a positive relationship. If you’re married or have a partner, you’ve got to talk about money honey.  You have got to respect the power of money. It can give you untold freedom, note I did not say happiness. One thing I have learnt is the time value of money, saving whatever you can, however little every day/week/month/year will go a long way. But you have got to have a plan, you cannot just save and have no plan.

Try this, imagine yourself at 60…where would you like to be? What would you like to be doing? What kind of life would you like to be living? Now work backwards and make that money work for you. I know it is easier said than done, but it can and has been done. I enjoy reading Centonomy and Rookie Manager on personal financial matters.

On passions- Pursue them. I am genuinely passionate about interior décor and this blog is one way I embody that passion. It has been challenging to fit this passion into everyday life, especially the projects, but I do indulge every chance I get and it makes me so darn happy!!

On family and friendships– This is what gives my life colour and flavor!! I once had a boss who asked me to choose family over career. It was an easy choice. Invest in these relationships. They are what is left when everything else fades away. Many movies/series and books and articles and speaking to older people have made me realize this. I am currently reading When Breath Becomes Air and so far, it has forced me to question my existence and think about death and dying. We are all dying, it’s not if, but when (don’t stone me. It’s a fact). So what should we do when we are living? What does a life of purpose for ME look and feel like?

On health and fitness- I remember a time when I would eat whatever I want and still have a fine waistline. This becomes a fallacy the older you grow. One week of bad eating and it is written all over your body like a tattoo!! Add having a baby to that equation. So I practice moderation. I ensure to eat healthy most of the week and have a cheat day on Saturday or Sunday (more often than not both). To exercise at least thrice a week and have physical activities lined up on weekends (walks, hikes, runs, cycling, yoga). Be active. Do activities you enjoy, even running after children can be a good work out!  I fall off the wagon every once in a while, but I always get back up!

Here is to my new year and to a bigger and better DIY NYumbani!!

Have you got any wise words to share? Comment!


Home made granola

Hello DIYers!

Is it just me or is time flying? It was January just the other day! Oh well, I really wish time would move in slow motion during the weekend.

The cost of living is on the rise and one of the things i am working hard to do this year is to save as much as possible. One of the ways i am doing that is by making some things that i would ordinarily buy.

My mornings are usually a crazy rush of getting ready, chilling with baby and preparing her meals for the day. This combined with my love for sleep…i rarely have time to sit and have breakfast but i know its the most important meal. So i eat on the go. One of my favorite things to munch on is granola or muesli. And these things cost a pretty penny in the supermarket.

Cue my DIY persona!! I now make the granola at home! Which is nutritious, filling and saves costs!! Today i will share how i do it…

The Ingredients: Weetabix, Oats, peeled peanuts,sunflower seeds, pumpkin seeds, chia seeds, golden raisins, (not in the picture)sugar and olive oil. All these ingredients are available at Chandarana Supermarkets

You can be creative with the ingredients and introduce any cereals or nuts you like. Some of the other ingredients i have tried are black raisins, apricots, cornflakes and raisin bran.

Mix all the dry ingredients in a bowl. I measure the quantities using a measuring cup you could also use a serving spoon …or your eyes!

I don’t take honey. An alternative to honey is syrup. Since i am saving money, i made my own syrup  by boiling some sugar (2 heaped tablespoons) with 180ml water. Boil until it starts to bubble.

I then mixed the sugar syrup with the dry ingredients using a spatula. Pour the syrup or honey little by little to the dry ingredients as you mix. The ingredients should only be slightly soaked by the honey/syrup. The mixture should not get gooey.

IMG_20170226_123318

I then spread one table spoon of olive oil on a baking tray and spread the mixed ingredients on the tray. Popped it in the oven at 200 degrees for 10 minutes. The oven was pre-heated for about 5minutes.

The final product is dry and can easily crack in your hands. Place the granola in a tin for use as you please. You can have it with milk or yoghurt and fruits. It is also a nice snack to much on…It is full of nutritious goodness!!

IMG_20170226_155147

What is your go to breakfast meal?

Keep it DIY!!!

Key Holding

Hello DIYers!!

Are you one of those people who spends a few maddening minutes every morning looking for keys?

Well, the solution is very easy really, just have one designated place in the house where the keys are kept. I prefer to have a  place to hang keys right by the door. That way, the first thing you do when you walk into the house is hang the keys. It will take some time to get the hang of it but once you do, it becomes habit.

I know of a home where frantic search for keys is routine anytime someone wants to leave the house. I decided to make them a place to hang their keys and hopefully leaving the house will be a smooth affair.

I used an old photo frame i got from House of Leather a while back and never got to use.

img_20170105_122356

For this project i used gold hooks i got from the hardware at Yaya Centre, a hammer and some left over wrapping paper i got from Game Stores.

*note to self, i do need another trip there to stack on some DIY goodies.

I traced the wrapping paper with the picture frame cut outs. I cut the paper and stuck it with glue and placed it back in the frame with the wrapping paper facing up.

I measured and marked where to put the screws. Put them in with the hammer and some wrist grease (screwing them into the frame)  and viola!

I am yet to present it to the new owners….i hope they will appreciate it and use it to make leaving the house a smooth affair.

You can use many materials to make a key holder, however, the screws are a constant ingredient since they help hold the keys.

Where do you keep your keys?

Keep it DIY!!


Cardboard Shelving

Happy New Year DIYers!!

How has your 2017 started? Made any resolutions yet? Was one of them to be more organized? If so, then welcome to the first DIY project this year.

My wardrobe though spacious cannot fit all my clothes especially my tops and hubby’s tee-shirts…or i probably need to get rid of some of them. It’s time i applied the less is more principle again.  This is what it looked like.

img_9335

Quite messy…we just throw stuff in and quickly close before they fall out

But new year, new things. Yes?.  I definitely needed was more shelving to accommodate all the clothes and make getting dressed hustle free.

I used the good old cardboard used to package the home theater because it is sturdy and easy to cut. The other alternative would be to get plywood from the local carpenter. I took measurements of the space and cut the pieces as below.

Always remember: Measure twice, cut once. This saves you alot of trouble at the end.

The cardboard has folds thus making  it weak. This calls for reinforcement of those weak spots. I cut another strip of cardboard which i stapled onto the main cardboard. The end result is a solid cardboard with no folds or weak spots. I used the staple gun a normal stapler won’t work.

Cardboard is not the most attractive thing so next step is to give it a facelift. I used some polka dotted wrapping paper i got from Game Stores.

I marked with a pencil where i wanted the shelve to go. I put in the hooks and placed the decorated cardboard.

img_9354

Final product viola! Now to arrange the clothes

Have you done any organizing lately? How did that go?

Keep it DIY!!

Headboard update

Hi DIYers!

One last post before Christmas holidays! Change is the only constant in the world…i don’t know who said those words but they are so true in so many ways.

And with that in mind, I changed our bed headboard once again. I wanted a different feel to it and especially a look that will match any beddings or decor I chose.

This is what it looked like before and this is how i achieved this look.

img_3918

I wanted to give it a more modern and contemporary look. What better says modern and contemporary than leather! I got a faux leather fabric in white for the update.The fabric is soft and not too thick or too heavy making it perfect for the job.

img_7418

Using the staple gun i got from Game Stores for about Ksh1,400. I stapled it on the headboard while making sure its tautly stretched for a good effect.

I was happy with the final product as below….

img_7432

Quick and painless…especially with the staple gun!

What projects have you been up to lately?

Happy Holidays and Keep it DIY!!


Acrylic paint crazy

Hello DIYers!

Do you have that item that you have always had and you use it very few times because it lacked appeal? And you always wondered how to make it more appealing? How to give it a face lift? That a little change will help you appreciate the item more and that it will make you use it more?

This item could be anything really  clothes, shoes, a handbag, accessories, furniture.

I have this pair of shoes that i like, they are basic black and are rather boring. They honestly could do with a bit of character.

After reading this piece on pineconeshelf i decided to try it out on the shoes. I got the bronze acrylic paint and some paint brushes from Text Book Centre for about Ksh500 and Ksh200 respectively.

img_7456

I wanted to create lines on the tip of the shoe, so i cut out and stuck some masking tape, painted it and let it dry for a day.

So  i was left with some paint  and it was at this point that i went a little crazy and decided i might as well paint a few more things. I got this mason jar which initially had marmalade in it, cleaned it in and out. Also i got a sufuria which was rusted and i still had had plans for it in a future project.

At the end of the day i had painted three things and i loved the results! The shoes pop with character and I wear them more now! The mason jar now sits on my desk at work with pens in it. The sufuria is yet to be used but soon…

img_7473

Try out the acrylic paints and be creative with the application! Don’t for get to share your end results!

Keep it DIY!